Showing posts with label kids. Show all posts

Tuesday, April 9, 2013

CTR Wall Art


I wish I could take credit for this idea, but I can't.  I think it is a variation of the baptism towels I've seen on the web.

This project began as a "Souper Saturday" project in the fall.  Quick Primer: "Souper Saturday" is a play on "Super Saturday" which is the name female members of my church congregation  lovingly give to the day in the fall when we can sign up and make multiple crafts in one day (about four hours worth).   In my congregation, we also bring potluck soups to share. 

I ended up not working on my own crafts so much, but helping others work on their vinyl projects.  And silly me, I forgot to take pictures of them.

This last weekend, I decided to get caught up on my projects.  I completed this picture mat project, and some church-related activity books.  I then wanted to tackle this project, but could not find a tutorial online.  I had forgotten the instructions in the nearly six months since I had picked up my fabric at the store.

I decided to create a tutorial for everyone else.

Materials needed:

2-3 types of fabrics.  You'll want one of the fabrics to be big enough for your background.  The green shield is on a background slightly larger than 8x10 so I could tape the sides to the mat.  The pink one is adjusted or the larger frame and mat.
2 types of interfacing.  You want one sided interfacing for the background fabric to give it stiffness.  The second type needs to be two sided to act as your glue" between layers.
2 copies of the CTR shield.  (Find it here).
x-acto knife
sharp scissors
Iron
Damp cloth and dry cloth

For this project, I used three fabrics.


1)  Either create a mirror copy of the shield on a copy machine, or trace the lines with a pen on the back.  I did the latter.

Original
Mirror version in pen


2)  Using your double-sided interfacing, trace the backwards shield in three parts. You could trace the just the 1/2 inch shield outline and the letters, but I thought it was easier to trace the small shield, the large shield and the letters separately.

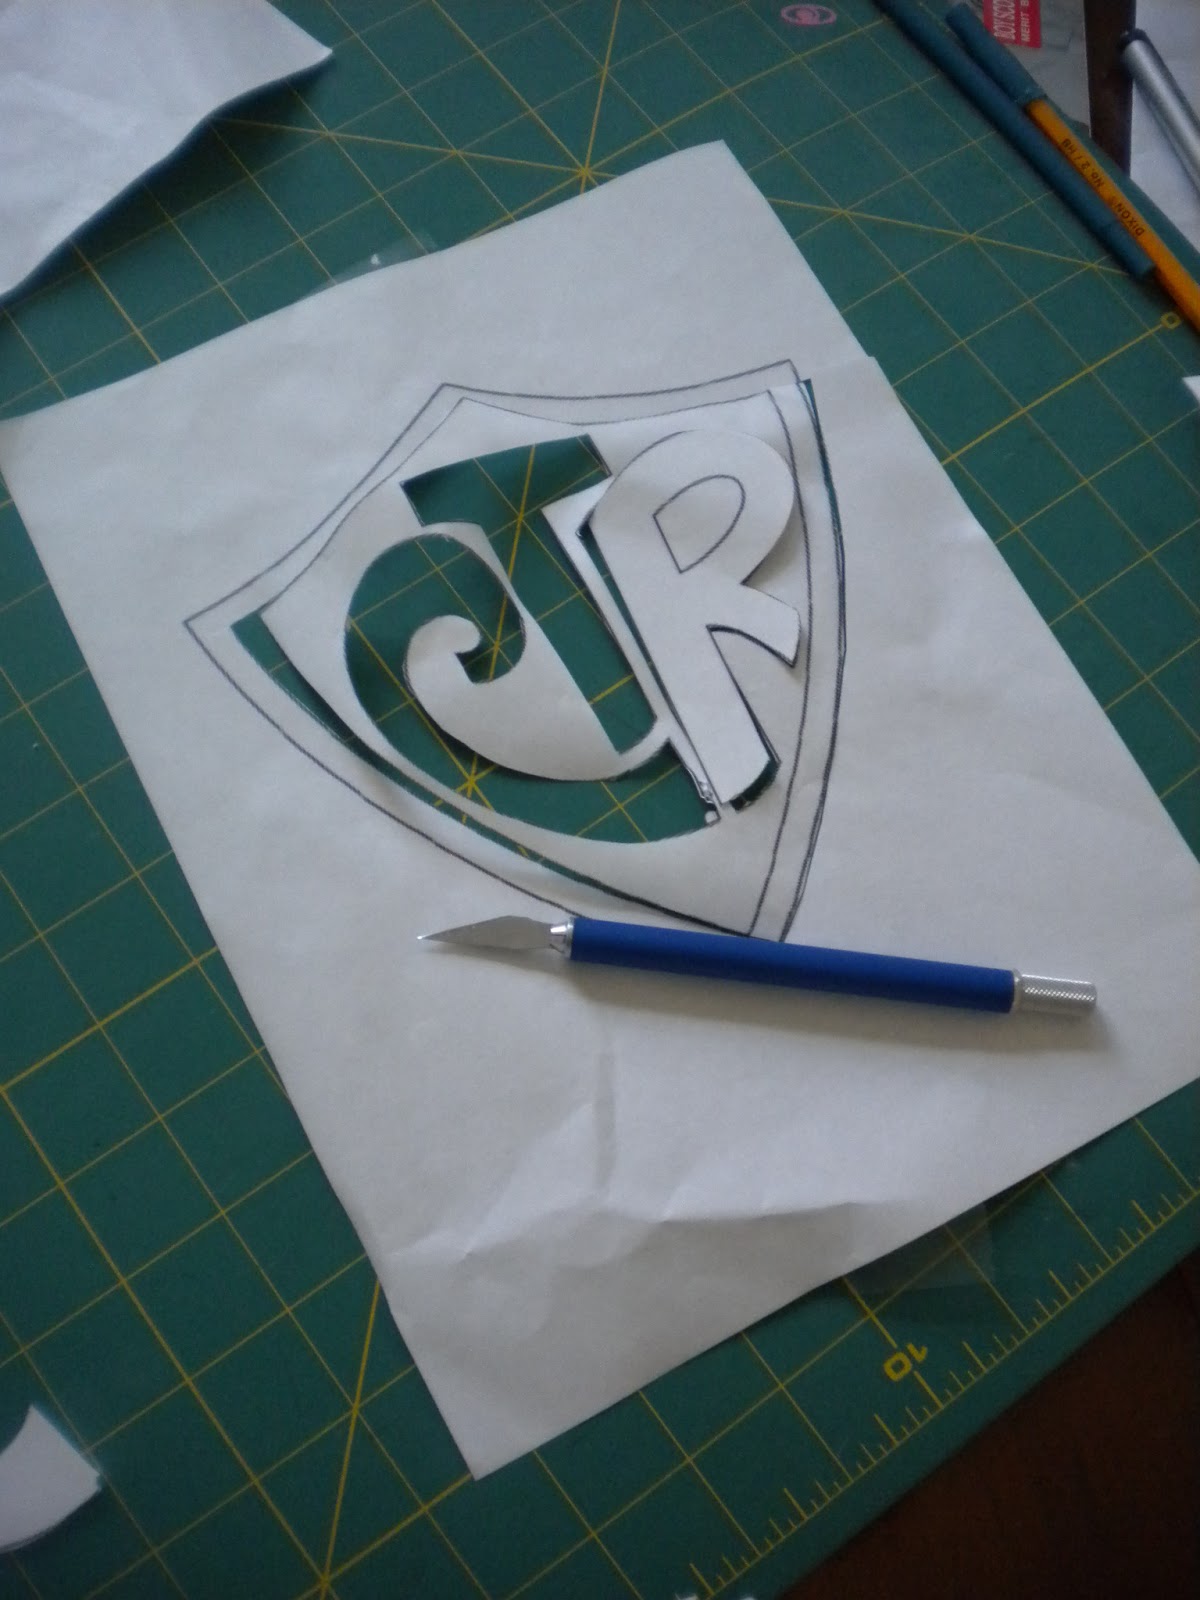
3) On the second paper copy of the CTR shield, use your x-acto knife to cut out the letters and part of the shield.  You'll need this later.


4)  After you've traced everything, do a rough cut of the interfacing and place on the backside of your iron fabric for pressing.  Press with a hot iron for a few seconds--just long enough to adhere the interfacing to the fabric.


5) Cut the "fused" interfacing and fabric with sharp scissors. This is reason you needed to trace the letters backwards.  Do this for both the large and small shields as well. 


6)  On the background fabric, iron on the fusible web using a cloth to cover the web and fabric.  (The kind I used was like plastic-like and would have melted if it had come into direct with the iron). 

Before
 Using the cloth
 After

 7)  Peel the paper backing off the large shield and center it on the background fabric.  Press.  Some types of double-sided interfacing require you to use a wet cloth over the top. 


8)   Check the fit of the smaller shield.  Make any cutting adjustments while the paper is on.  If it looks good proceed to the next step. 


9)  Peel the paper backing off the smaller shield and position it for ironing.  Press.


10)  Using the second paper copy we cut and set aside earlier, place it on top of both shields for correct position.  

11)  Peel off the paper backing on the letters and position then on the shields.  Press
 
 12)  Voila!


13)  Center the piece in your frame or behind a mat.  I used another mat.  


A close up of the background fabric.  It says, "Faith, Hope, Love, Charity" all over it.   How cool is that?


 The finished project!  I hope you enjoyed your visit today!


Wednesday, February 20, 2013

Disney Shirts

Ready for it?  I'm going to post pictures of our Disney shirts. To protect the identity of my kids, I had a little fun in Photoshop...


So how did we do them?  Easy peasy.
1) I downloaded a template of Mickey Mouse ears.
2) Next I traced that template on our shirts in pencil.


3) I sewed around the Mouse ears with dental floss.  I've read you should use waxed.  I used the teflon slippery kind.


4)  I pulled the dental floss tight to make a puckered "balloon".


Now this is where I diverged on the two techniques.  By the way, I skipped the soda ash step some tutorials recommend. 

Orange and black Halloween Mickey shirts. (concentric circle idea)
1) I put rubber bands around the puckered balloon to keep it separate.  I did mine right on the line of the floss--I've since read you should make sure it is below it to keep it pretty separate.  


2) Using the puckered balloon as the end, wrap rubber bands to section off the shirt..  By the end it should look something like a snake.


3) Use fabric dyes in any pattern you want until each section you want colored is colored.  For more coverage, make sure you get into the folds or grooves of the shirt.  If you want more white to show through, leave some space between dye areas.


4) Be careful not to let dyed sections touch each other--color will transfer.  My two "snakes" are a little too close.  Also, I got some color transfer when I had the shirts on the grocery store bags.  The ink from those rubbed off onto the orange sections. 


5) Wrap in plastic and let it sit for a day or so.  Sorry no picture of that, but what I did was use the plastic sheeting in the above picture.  I wrapped the first shirt, then added the second, and then the third keeping the clear plastic between each additional shirt.  I then wrapped the whole thing together and put it in a plastic bag for a couple of days.

6) Rinse your shirt until the water runs clear.


Blue and red (swirl shirts)
1) Lay your shirt flat with the Mickey poking up in the center. 


2) Take the Mickey and twist it clockwise gathering up the shirt as you go.


3) Once the shirt resembles something like a fat disk, carefully wrap rubber bands across it dividing the shirt like a pie.  Keep the Mickey head poking up.  


4)  Color the Mickey head with fabric dye--wrap with plastic wrap and secure with elastics.  Then use the fabric dyes in any order you want until on the pie until each section you want colored is colored. 


 5) For more coverage, make sure you get into the folds or grooves of the shirt.


6) Be careful not to let dyed sections touch each other--color will transfer.

7) Wrap in plastic and let it sit for a day or so.

Once the dyes have set for a day or two, unwrap each shirt and run under cold water until the water run-off is clear.  Dry the shirts and wash them again.


On the blue and red Mickey shirts, the stitched Mickey didn't show up well.  To rectify that I tried using bleach pen to trace the outline.  That didn't work too well, so I used a bleach with a toothpick and a q-tip to trace the out line and that worked much, much better.


Fall 2013 note:  I made the original shirts a couple of years ago and I had really large dye bottles which still had red, blue and black.  I thought I could just reuse them.  The blue came out fine, but the red turned pink after the final wash and the black is really more navy blue at this point.  I finally bought new red dye because the pink was unacceptable to me.  It worked out fine. 

Other tutorials with photos here and  for swirl pattern here.  Cutest video of both techniques here.